


Table of Contents
Water ring vacuum pumps are widely used for handling gases, vapors, and liquids across a variety of industries. These pumps create a vacuum by utilizing a rotating water ring within the pump chamber, making them ideal for continuous, high-volume pumping. However, like all mechanical systems, water ring vacuum pumps can experience issues over time. Troubleshooting these issues quickly is crucial for maintaining system efficiency, avoiding costly repairs, and ensuring smooth operations.
This article provides a step-by-step diagnostic flowchart for troubleshooting common issues in water ring vacuum pumps, helping operators and technicians quickly identify and resolve problems.

Objective of the Article:
The objective of this article is to:
- Provide a systematic troubleshooting guide for common issues in water ring vacuum pumps.
- Help operators and maintenance teams identify problems such as low vacuum pressure, water leakage, and excessive noise using a step-by-step diagnostic flowchart.
- Offer actionable solutions for resolving common water ring vacuum pump issues to restore system performance efficiently.
- Equip users with knowledge to perform routine maintenance and inspections to avoid future issues and ensure the longevity of the system.
By the end of this article, readers will have the tools and knowledge to diagnose and troubleshoot common water ring vacuum pump problems.
Common Issues in Water Ring Vacuum Pumps
Here are some of the most common issues operators encounter with water ring vacuum pumps:
- Low vacuum pressure
- Excessive noise or vibration
- Water leakage
- Reduced pumping efficiency
- Overheating or motor failure
Step-by-Step Diagnostic Flowchart for Troubleshooting Water Ring Vacuum Pumps
This troubleshooting flowchart is designed to help users systematically approach the common problems that can arise with water ring vacuum pumps. For each problem, we will outline potential causes and solutions.
Low Vacuum Pressure
Step 1.1: Check Water Level
- Cause: Insufficient water level in the pump can affect the creation of the water ring, leading to low vacuum pressure.
- Solution: Ensure the water supply to the pump is adequate and that the water level is within the manufacturer’s specified range. Refill or adjust water as needed.
Step 1.2: Inspect for Air Leaks
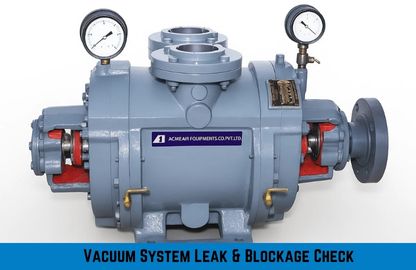
- Cause: Leaks in the vacuum system can reduce pressure.
- Solution: Inspect all seals, gaskets, and connections for leaks, especially at the suction and exhaust points. Tighten or replace damaged seals.
Step 1.3: Check for Blockages
- Cause: Blockages in the discharge or inlet pipes can impede airflow and reduce the vacuum pressure.
- Solution: Inspect and clean the suction and discharge lines, ensuring no debris or material buildup is obstructing airflow.
Step 1.4: Verify Pumping Capacity
- Cause: If the vacuum pump is undersized for the required workload, it may struggle to maintain vacuum pressure.
- Solution: Check the system’s specifications and verify that the pump capacity is appropriate for the application. Consider upgrading if necessary.
Step 1.5: Inspect the Pump Shaft and Water Ring
- Cause: Damage or wear on the pump shaft or water ring can cause a loss of vacuum pressure.
- Solution: Inspect the internal components for wear or corrosion. Replace damaged parts as needed.
Excessive Noise or Vibration
Step 2.1: Check for Misalignment
- Cause: Misalignment of the motor, pump shaft, or coupling can cause excessive noise and vibrations.
- Solution: Realign the motor and pump shaft using precision tools. Verify that the coupling is securely attached and aligned.
Step 2.2: Inspect the Bearings
- Cause: Worn or damaged bearings can lead to noise and vibrations during pump operation.
- Solution: Check the bearings for wear, noise, or overheating. Replace bearings if they show signs of damage or wear.
Step 2.3: Inspect the Pump Mounting
- Cause: Loose or improperly mounted equipment can increase vibration.
- Solution: Tighten the mounting bolts and ensure the pump is securely fastened to its base or frame.
Step 2.4: Check for Cavitation
- Cause: Cavitation occurs when the pump operates with inadequate water flow, causing bubbles to form and collapse in the water ring.
- Solution: Increase the water supply to the pump and adjust the water flow to prevent cavitation. Ensure the pump is not drawing air.
Water Leakage
Step 3.1: Inspect Seals and Gaskets
- Cause: Leaks can occur if the seals or gaskets in the system are damaged or improperly fitted.
- Solution: Check all seals and gaskets for damage or wear. Replace any that are cracked, torn, or degraded.
Step 3.2: Check Water Connections
- Cause: Leaks can also occur at the water inlet or outlet connections.
- Solution: Tighten any loose fittings or connections. Replace any corroded or damaged pipes.
Step 3.3: Verify Water Flow Rate
- Cause: Excessive pressure or flow can cause water to leak out of the pump system.
- Solution: Adjust the water flow to the pump to match the system’s operating specifications.
Reduced Pumping Efficiency
Step 4.1: Inspect the Motor
- Cause: A malfunctioning motor can result in reduced pumping efficiency.
- Solution: Check the motor for overheating, insufficient power, or electrical issues. Test the motor’s performance and replace or repair it as necessary.
Step 4.2: Check Water Quality
- Cause: Contaminated water or the buildup of debris in the pump can reduce efficiency.
- Solution: Clean and replace the water regularly. Use a filter system to ensure the water supply remains clean and free of debris.
Step 4.3: Verify Pumping Capacity
- Cause: If the system has been modified or the pump has been undersized for the new operating conditions, it may not be efficient.
- Solution: Verify the system’s specifications and ensure the pump capacity matches the required flow and vacuum levels.
Overheating or Motor Failure
Step 5.1: Check for Insufficient Cooling
- Cause: If the pump or motor is not properly cooled, it can overheat and fail.
- Solution: Ensure that the cooling system is functioning properly. Verify that ambient temperatures are within acceptable limits.
Step 5.2: Check Electrical Supply
- Cause: Voltage spikes or fluctuations can cause overheating or motor failure.
- Solution: Inspect the electrical connections and ensure that the voltage supplied matches the motor’s specifications.
Step 5.3: Monitor Operating Conditions
- Cause: Extended operation at maximum capacity can cause overheating and motor failure.
- Solution: Monitor the system’s load and ensure it operates within design parameters. Allow the system to cool down if operating at high pressure for long periods.

Troubleshooting Flowchart for Water Ring Vacuum Pumps
Start -> Check for low vacuum pressure
|
+-> Check water level -> Add water as needed
|
+-> Inspect for air leaks -> Tighten seals or replace gaskets
|
+-> Check for blockages -> Clear debris from lines
|
+-> Check pump capacity -> Confirm correct pump size for application
|
+-> Inspect internal parts -> Check water ring and shaft for wear
Start -> Excessive noise or vibration
|
+-> Check alignment -> Realign motor and pump shaft
|
+-> Inspect bearings -> Replace worn bearings
|
+-> Inspect pump mounting -> Tighten mounting bolts
|
+-> Check for cavitation -> Adjust water flow
Start -> Water leakage
|
+-> Inspect seals and gaskets -> Replace damaged seals
|
+-> Check water connections -> Tighten fittings and check pipes
|
+-> Verify water flow rate -> Adjust to proper levels
Start -> Reduced pumping efficiency
|
+-> Inspect motor -> Check for overheating or electrical issues
|
+-> Check water quality -> Replace or clean water regularly
|
+-> Verify pump capacity -> Ensure correct pump size for workload
Start -> Overheating or motor failure
|
+-> Check cooling system -> Ensure proper cooling for pump
|
+-> Check electrical supply -> Verify proper voltage
|
+-> Monitor operating conditions -> Avoid running at maximum capacity for long durations
FAQs: About Water Ring Vacuum Pump
How often should I inspect and troubleshoot my water ring vacuum pump?
Regular inspections should be done every 6 months or after any major system changes. Additional checks should be done if you notice performance issues, unusual sounds, or operational inconsistencies.
Can a water ring vacuum pump operate without water?
No, water is essential for creating the vacuum in the system. Operating a water ring pump without water can cause damage to the pump and significantly reduce its performance.
How do I know if the vacuum pump is underperforming?
Signs of underperformance include low vacuum pressure, inefficient material flow, excessive noise, or increased energy consumption. These should be addressed promptly to avoid further system damage.
What is cavitation, and how does it affect the vacuum pump?
Cavitation occurs when there’s insufficient water flow, causing air bubbles to form and collapse. This leads to damage to the pump and inefficiency in the vacuum process. Ensure adequate water supply and adjust flow rates to prevent cavitation.
What should I do if I hear unusual noises from the pump?
Unusual noises could indicate misalignment, worn bearings, or cavitation. Inspect and align the pump, replace bearings if necessary, and adjust water flow to ensure smooth operation.
Conclusion
Troubleshooting a water ring vacuum pump requires a systematic approach to identify the root cause of performance issues. By following this step-by-step diagnostic flowchart, operators can quickly pinpoint problems such as low vacuum pressure, excessive noise, and water leakage, and take corrective actions. Regular maintenance, timely troubleshooting, and adherence to operating parameters are essential for ensuring optimal performance and longevity of your water ring vacuum pump system.
About Author
CEO
Mr. Vishwesh Pardeshi is the CEO of Acme Air Equipments Company Pvt. Ltd., an industrial and engineering goods manufacturing company based in Ahmedabad, Gujarat (India). He has taken over the responsibility from founding Partners and Directors of the Company, and is now leading a talented group of professionals since 2020 by bringing in vast industrial and management expertise. By qualification, he holds a Bachelor Degree in Mechanical Engineering and also holds a MBA degree from reputed institutes. Under his leadership, the Company has successfully executed prestigious projects by delivering high quality and world class products from a state of the art manufacturing facility which combines CNC-enabled precision manufacturing and strong after sales support. In line with the Vision, Mission and Core Values of the Organization, Mr. Vishwesh Pardeshi continues to drive Quality, Reliability and Global Expansion at Acme Air Equipments Co. Pvt. Ltd.